Posts

Showing posts with the label Tips and Tricks

Import Blog Posts to Facebook Page

Image
If you are blogging then you must have created Facebook Page for your blog. Now do not keep it blank, post something so that Facebook users who have Liked your Page can engage with it. You can post status updates with interesting discussions or can update it with your newly created blog posts.

How to Highlight Author Comments in Blogger

Image
Today we will learn to highlight author or admin comments in Blogger so that your comment as administrator stands out from comments posted by others. Blogger has advanced and many new codes are added. So to highlight the author or the admin comment in Blogger you have to just apply some simple trick to activate it. But however, this tutorial is not meant for those who have enabled threaded comments . Here’s an advance method to do it. You will find that not the comment body but the whole section of your comment as admin or other comments as author will change. So first just follow the steps:

Email Subscription Widget for Blogger - Official

Image
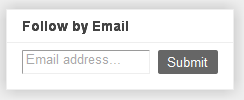
Blogger Buzz introduced the new " Follow by Email gadget ". It's an email subscription box widget which let your readers to subscribe to your blog posts by email. This widget works in conjunction with Google FeedBurner . Whenever you write a post and publish it, your readers, who have subscribed to your blog by email, will be able to get the updates to their inbox. Let's have a preview of the new gadget.

New Features by Blogger In Draft

Image
Blogger is advancing day by day and now there are many new features that are now available to Blogger in Draft . Adding captions to Images in Blogger Now you can add captions to your images without any extra codes and scripts. Just click on the image that you have uploaded, and click “Add caption” . And write your caption just below your image. Simple Blogger Tutorials

How to Configure and Setup FeedBurner for Blogger

Image
Google FeedBurner is one of the top most web feed management provider which is commonly used by all bloggers to manage their blog feeds. Blogger powered blogs has this setting too but first you need to configure and set it up properly. So today I will guide you through this. Adding and Claiming Your Blog’s Feed Step 1: Log in to FeedBurner and write your blog’s feed address in “Burn a feed right this instant”. This is where claiming process starts. Your feed address will be: http:// example .blogspot.com/feeds/posts/default If you are a podcaster then check the podcaster box and click “Next”.

CSS3 and Blogger

Image
Do you know that my blog uses some properties of CSS3? For example, look at my main-wrapper and sidebar, you will find that there are shadow effects. If you look at my footer, there you can find text-shadow effects. All the new versions of browsers mainly Firefox (3.5+), Opera (10.5+), Chrome (5+) and Webkit/Safari (3.1+) supports CSS3, while IE (9+) support very few (till date). What are the Styles that can be Done by CSS3 in Blogger?

How Margin and Padding Works: CSS

Image
Padding is used to clear the area around the content of an element within the border and is affected by the background color of the element. While, margin clear the area around an element which is outside the border and do not have a background color. See at an example of a box model:

How to Add Email Subscription Box to Blogger

Image
Email subscription box let your blog readers to get latest post updates directly to their mailbox. This simple tutorial will tell you how to add it to Blogger. Step 1: So first, you need to set up Blogger feeds with Google FeedBurner. If you already added your blog feeds then move on to step 2.

Styling and Customizing Borders in Blogger

Image
As we all know, Blogger is based on Cascading Style Sheets (CSS). Adding, styling and customizing the borders in Blogger are easy to implement as it uses the CSS Properties. With the help of borders, you can separate the different sectors of your blog, such as headers, sidebars or can be used to highlight the blockquotes and featured contents. A blog designer can easily make a beautiful template just using borders and background colors. Let us see how to style and customize the borders with some examples.

Image Hover Effect using CSS3

Image
Previously it were the days of CSS 2.1 when designing web templates were limited and had to use JavaScript to add some special effects. But as days passed, technology improved and CSS3 was introduced. Working with CSS3 is fun as it can do much more and can handle many new effects without any use of JavaScript. Today I am going to tell you how to change opacity (transparency) of an image and add hover effect using CSS3. See the example below, you will find that whenever you place your mouse pointer over the image, it will hover form transparent to full opaque and with some transition effect.

Static Pages are Now Available in Blogger

Image
Static pages are now finally made available in Blogger. Now you can create a static ' About ' page or ' Contact Me ' page for your blogs. So it became easy to hide your "Contact Me" page and other pages from appearing in blog's homepage. It is simple to add static pages and create a page similar to how you write a blog post. But the limitation is upto 10 posts. How to add static pages to Blogger

How to Get Your Blog Indexed Quickly

If you are having trouble to get your blog indexed by search engines or you are unaware of it, then you must be thinking to do something very quickly. Indexing by major search engine is really important to get visitors your blog if you want it to be read by others. In this article I will tell you the simple steps that every blogger can do to get your blog indexed by Google, Yahoo and Bing as quickly as possible. First of all, check whether your blog is already index by searching for site:www. example .com in search boxes of respective search engines. If you think you are not happy with the results then here is a check list.

How to Add Social Bookmarking Icons to Blogger

Image
If your blog post is just awesome then adding social bookmarking icons or buttons below Blogger posts will let your readers to bookmark and share your posts with their friends. People are becoming social, sharing things on Facebook, Twitter and other social networking sites. I have seen that there are many times when I get more readers for my blog from social networking sites whenever someone shares my posts with their friends. You may also like to get social by adding bookmarking and sharing buttons, so I made and have updated this tutorial with 14 best bookmarking sites including a feed icon of your blog's feed. Demo Advantages of Adding Custom Sharing Icons It is more flexible than official Blogger share icons due to: Use of custom images which can be of your choice with different styles and sizes. More social networking sites to share your posts. It is faster than other sharing scripts. And many more as it can be customized.

How to add Read More option - Officially from Blogger

Image
If you are looking for a hack to add Read more to Blogger to hide full posts, then stop searching because Blogger has now officially announced this option for us which is also known as Jump Break . Now you don't have to add any separate hack in your template. What you have to do is enable some options in your Blogger settings and you are ready to use this feature. Thinking what are the options you have to enable! Well, let us find out. While posting a new post, write a paragraph, use the "jump break" option and continue writing again. This is the option which will add the read more link to your posts on your homepage.

Hide Number of Posts Shown Beside Particular Label

Image
You must have seen that when you add a label widget in Blogger, it’s showing the number of posts each label contains. Well, you may don’t want to show it. To hide the number of posts showing per label in Blogger, you have to enable some settings and to do that you need not to edit your template for it. Go to Design > Page elements tab and click the edit button under the label widget. Now uncheck the “Show number of posts per label” and save it. View your blog and you will find that the number that is shown beside each label is gone.

Add Three Columns in Footer to Blogger

Image
Keeping you sidebars clean makes your blog look good. This is where the role of the columns in footer section comes in. Also it will give your blog a new style. For example, see at the bottom of my blog. This simple tutorial will explain how to do create and add three sidebar columns to footer section in Blogger templates.

Hide Post from Appearing on Homepage of Blogger

Image
Hiding a post appearing on first page or better say homepage of Blogger is really a simple trick. It’s a trick which is all about posting a blog post to a certain date. Sometimes it may so happen that you may do not want any blog post to be seen on the homepage and it’s not a static page on Blogger . So you need to hide it. To be true, you cannot hide any posts if you have published it but you can back-date it while publishing so that it does not appear on the homepage.

List of Tutorials for Blogger

Image
I have made a list of Blogger tutorials that are posted in my blog. You can find many tutorials on editing and customizing Blogger templates and make your blog unique and beautiful. So let's browse through what can we find. It's divided into segments. To go to each segment just click the links below to scroll to that.

How to Create Three Column Blogger Template

Image
You must have seen many blogs having three columns. You may also want to make your own three column Blogger Layout Template and give your blog a new level in style. So let's do it with a simple tutorial. You can see in Design > Page elements that you already have two column, one for the main body and the other is the sidebar. So you need to create and add an extra sidebar column. Adding the Third Sidebar Column in Blogger Template

How to Make Footer Increase in Width in Blogger

In previous tutorial I have told you how to expand Blogger Header the width of the Browser . Now apply this same rule to increase the Blogger footer section the width of the browser. Let's have a tutorial.